Contents
- Overview
- Navigating the interface
- Personal preferences
-
General
- Title
- Auto-open on startup
- Tickets per page
- Enable tickets per page customization
- Show ticket preview
- Enable ‘enhanced’ ticket previews
- Additional view grouping separator
- Number of lines to display per ticket row
- Use 12 hour (AM/PM) for times
- Show 'First' button
- Show 'Go to Play' button
- Enable Guided mode
- Show user profile pic in views
- Always return to Lovely Views when all ticket tabs are closed
- Return to Lovely Views workaround
- Disable enhanced sorting (experimental)
- Disable keyboard shortcuts
- Display description
- Auto-refresh rate
- Display auto-refresh control
- Highlight unread tickets
- Unread mode setting
- Show day of the week in dates
- Use Zendesk tag sorting method
- Allow agents to close tickets
-
Views list
- Hide 'Suspended' tickets view
- Hide 'Deleted' tickets view
- Disable the 'Misc' folder
- Rename the 'Misc' folder
- Display the 'Misc' folder / root level views at bottom
- Subfolder order
- Disable the 'Personal' folder
- Rename the 'Personal' folder
- Place 'Personal' folder at bottom
- Disable the 'My user profile' folder
- Rename the 'My user profile' folder
- Place 'My user profile' folder at bottom
- Enable bookmarks view
- Enable 'My ticket tabs' view
- Show 'Download view list CSV' feature
- Enable 'Show only my views' toggle
- Enable favorites
-
Selected tickets
- Disable bulk edit
- 'Don't change group' default setting
- Requester must be the same when merging tickets
- Custom merge method
- Force custom merge method onto agent
- Add temporary tag while merging
- Agent comments are internal by default
- Allow bulk close tickets
- Enable 'Select all pages' feature
- Allow to change requesters
- Agent collision
- Ticket sidebar
- Top toolbar
- Backup and restore
If you've switched to the newest Lovely Views version, please go to Lovely Views 4.4 » User guide.
Topics covered in this guide:
-
Overview
An introduction to the comprehensive features and functionalities of Lovely Views. -
Navigating the interface
A guide to understanding and using the main components of Lovely Views. -
Default views
Explore the built-in views designed to cater to common ticket management needs. -
Managing views
Instructions on how to customize and manage your ticket views effectively. -
Default folders
Learn how to navigate the preset folder structure for efficient ticket organization and discover how to leverage dynamic folders like Favorites and Recent Searches to adapt to user-specific workflows. -
Organizing views into folders
Steps to categorize your ticket views into a structured hierarchy for better organization. -
Managing tickets
Tips on handling individual tickets and utilizing bulk actions for efficiency. -
Tracking updates
Stay informed about the latest updates and news in Lovely Views. -
Personal preferences
Personalize your Lovely Views experience with browser-specific settings. -
Customizing preferences
An extensive admin guide to tailor Lovely Views settings to your needs. -
Overriding tickets per page settings
Adjust number of tickets per page globally, for specific views, or according to individual user preferences. -
FAQs
Quick answers to common questions about Lovely Views. -
Conclusion
Final thoughts in continuing to explore and utilize Lovely Views for Zendesk ticket management.
Overview
Welcome to Lovely Views, an advanced tool designed to enhance your ticket navigation, organization, and management within Zendesk. As a powerful extension of the standard Zendesk interface, Lovely Views offers a suite of features to boost your productivity and help you manage tickets more efficiently.
This comprehensive guide is intended to familiarize you with the functionality of Lovely Views and provide you with the knowledge to utilize its full potential. Whether you're a seasoned Zendesk user or new to ticket management systems, Lovely Views is crafted to cater to your needs and simplify your workflow.
With Lovely Views, you gain access to an expanded array of tools and settings that allow you to customize your ticket views, automate repetitive tasks, and organize your ticketing environment for optimal performance.
Features at a glance
Lovely Views is equipped with a host of features designed to provide a seamless and productive working environment. Here are the key features that you can look forward to:
Unlimited views
Manage your workload with ease, where the standard 30-view limit is a thing of the past. Gain complete access to all your views, ensuring every aspect of your operations is just a click away.
Folders and sub-folders
Say goodbye to cluttered and unmanageable ticket lists. Organize your views into an intuitive hierarchy via folders and sub-folders that reflects the structure of your work.
Favorites
Keep your most frequently used views prominently placed for quick access. Favorites ensure that your essential tools are always ready, accelerating your daily tasks.

Bookmarks
Privately flag and quickly access important or frequently used tickets, keeping them organized in your personal Bookmarks view.
Integrated search
View your recent searches and save searches to reuse later.
Enhanced previews
Enhanced previews provide a comprehensive snapshot of ticket details, including all comments, for immediate action. Hover to get a full picture, then bookmark, mark as read/unread, identify spam, or delete tickets. Copy ticket links effortlessly, and access complete profiles for the requester, their organization, and all related users, streamlining your response and organization process without ever leaving the view. You can also quickly check if another agent is viewing the ticket or has it open.
More bulk actions
Perform actions on multiple tickets simultaneously, saving time and effort. We've added more bulk actions that are not available in a standard Zendesk view, such as: clear, mark as read/unread, bookmark/remove bookmark, and standard/custom merge.
Customizable settings
Tailor Lovely Views to your preferences. Adjust settings such as auto-refresh rates, notification toggles, and interface themes.
Advanced search and filters
Use powerful search functionality to filter tickets based on specific criteria.
Efficient navigation
Navigate between tickets with ease with ticket sidebar options and use bookmarks to keep your important tickets readily accessible.
Admin tools
Admins are equipped with more options for preferences: General, Views list, Selected tickets, Agent collision, Ticket sidebar, Top toolbar, and Backup & restore.
User preferences
Each agent can set up their personalized Lovely Views experience, ensuring consistency across devices and browsers.
Backup and restore
Securely back up your Lovely Views configuration and restore it when needed
to ensure you never lose your customized settings.
See how Lovely Views enhances your Zendesk experience with our comparison table.
These features are just the beginning. Lovely Views is continuously evolving,
with updates and new features regularly introduced to improve your ticket
management process.
Installation
Begin by navigating to the Zendesk Apps Marketplace. Search for Lovely Views and select the app. You can also use this direct link to visit the Lovely Views page on Zendesk. Click Free trial, then follow the on-screen instructions to install it within your Zendesk environment. This process integrates Lovely Views into your support toolkit.
Accessing the main Lovely Views app
Once installed, locate and click the Lovely Views icon in the Zendesk navigation bar. It is usually found at the bottom. This will reveal the app interface.
Accessing Lovely Views when pinned in the sidebar
If the Lovely Views app is pinned to your ticket sidebar, the icon should be immediately visible and can be clicked to open the app without the need to expand any menu.
Accessing Lovely Views when unpinned in the sidebar
To access Lovely Views when unpinned in Zendesk, click Apps in the ticket sidebar to reveal the app icons, and then select the Lovely Views icon.
Accessing Lovely Views via the top toolbar
Locate and click the Lovely Views icon in the top toolbar of your Zendesk interface. This will reveal the app on the right-hand side of your screen.
Initial configuration
Upon first launch, Lovely Views will be set to default settings suitable for immediate use. You can begin exploring its features right away.
Interface overview
Take a moment to familiarize yourself with the layout. Check the (1) Views list pane on the left for navigation, the (2) Views list controls on the top-left for quick access to settings for the views list, the (3) Ticket list on the right for tickets associated with the selected view, and the (4) View controls on the top-right for setting up a particular view with its tickets.
Customization settings
Click Menu and go through the settings to customize Lovely Views. If you're an agent, you can set up your personal preferences. If you're an administrator, consider renaming common folders, adjusting refresh rates, or exploring the advanced search features.
Support and help
If you have any questions or need assistance, you can get help from our support team via apps@lovestockleaf.com.
With these steps, you are now ready to dive into the world of efficient ticket management with Lovely Views.
Navigating the interface
The Lovely Views interface is thoughtfully designed to provide a streamlined navigation experience. It’s composed of the views list pane, the views list controls, the ticket list, and the view controls, each offering quick access to a range of functionalities that enhance your workflow within Zendesk. Below we delve into each component and how you can make the most of them.
Views list pane
The views list pane is the cornerstone of navigation within Lovely Views, positioned on the left side of the interface. It is designed to categorize and present the available views, facilitating quick and direct access to different groups of tickets. This central hub is key to maintaining an organized and efficient workflow.
To access the views list pane:
1. Locate the Lovely Views icon in the Zendesk sidebar.
2. Click the icon to expand the views list pane and display the ticket views.
Views
Your tickets are sorted into views or categories within the views list pane. These views might include 'My Tickets', 'Unsolved Tickets', or custom groupings that reflect your specific ticket management needs. Having these views helps streamline your workflow by providing quick access to grouped tickets that require your attention.
Default views you will see in your views list pane are:
Bookmarks - View all tickets you’ve personally bookmarked for rapid access, helping you manage important or frequently needed tickets discreetly and efficiently.
My ticket tabs - Here, you'll see the tickets that you have opened in tabs, providing a convenient way to jump back to specific issues you're working on.
Assigned - This section lists all tickets currently assigned to you, giving you a snapshot of your immediate responsibilities.
Requested - Here, you’ll find tickets that you have created or requested. It serves as a personal tracker for the issues you've raised or are invested in.
Followed - This view contains tickets you are following, perhaps because they involve multiple departments or are of particular interest. Following a ticket allows you to receive notifications about updates without being the ticket assignee.
CC'd - In this view, you'll see tickets where you've been included as a Carbon Copy (CC) recipient. It’s useful for keeping an eye on conversations where your input or action may eventually be required.
Admins also have access to these views:
Current ticket activity - This view provides real-time updates of all user activity on tickets. By default, admins have access to this view. However, it can now be enabled for specific roles or groups, allowing broader access to users. Administrators can configure access by selecting the desired roles or groups under the settings.
Suspended - This admin view holds tickets that have been suspended due to automation rules or because they require further review. These tickets are typically on hold from the normal workflow until an action is taken. You can also also allow agent access instead of admin-only.
Deleted - This admin view is where you’ll find tickets that have been removed from the active list. It’s a safeguard to review and possibly restore tickets that may have been deleted in error. You can also also allow agent access instead of admin-only.
Check out the Default views section for more information and usage tips.
Clicking a view from the views list pane will populate the tickets list pane with all tickets corresponding to the chosen category, ensuring you have a focused overview of the relevant issues at hand.
Folders
Folders play a critical role in organizing your ticket views into a structured hierarchy. They provide a visual representation of how views are categorized, making it easier to navigate and manage tickets based on specific classifications.
To toggle the visibility of views within a folder, click the right-facing arrow next to the folder's name to expand and reveal all contained sub-folders or views. To condense the list and hide views and sub-folders (if any), click the downward-facing arrow. This action collapses the folder, streamlining your interface for focused navigation.
These folders are on by default in your views list pane:
My user profile - This folder is on by default and contains four profile views: Requested, Assigned, CCd and Followed.
Misc - By default, Suspended and Deleted views appear here. Also, all views not otherwise grouped will be placed together in this folder.
Personal - By default, your personal views are grouped separately from other views under this folder.
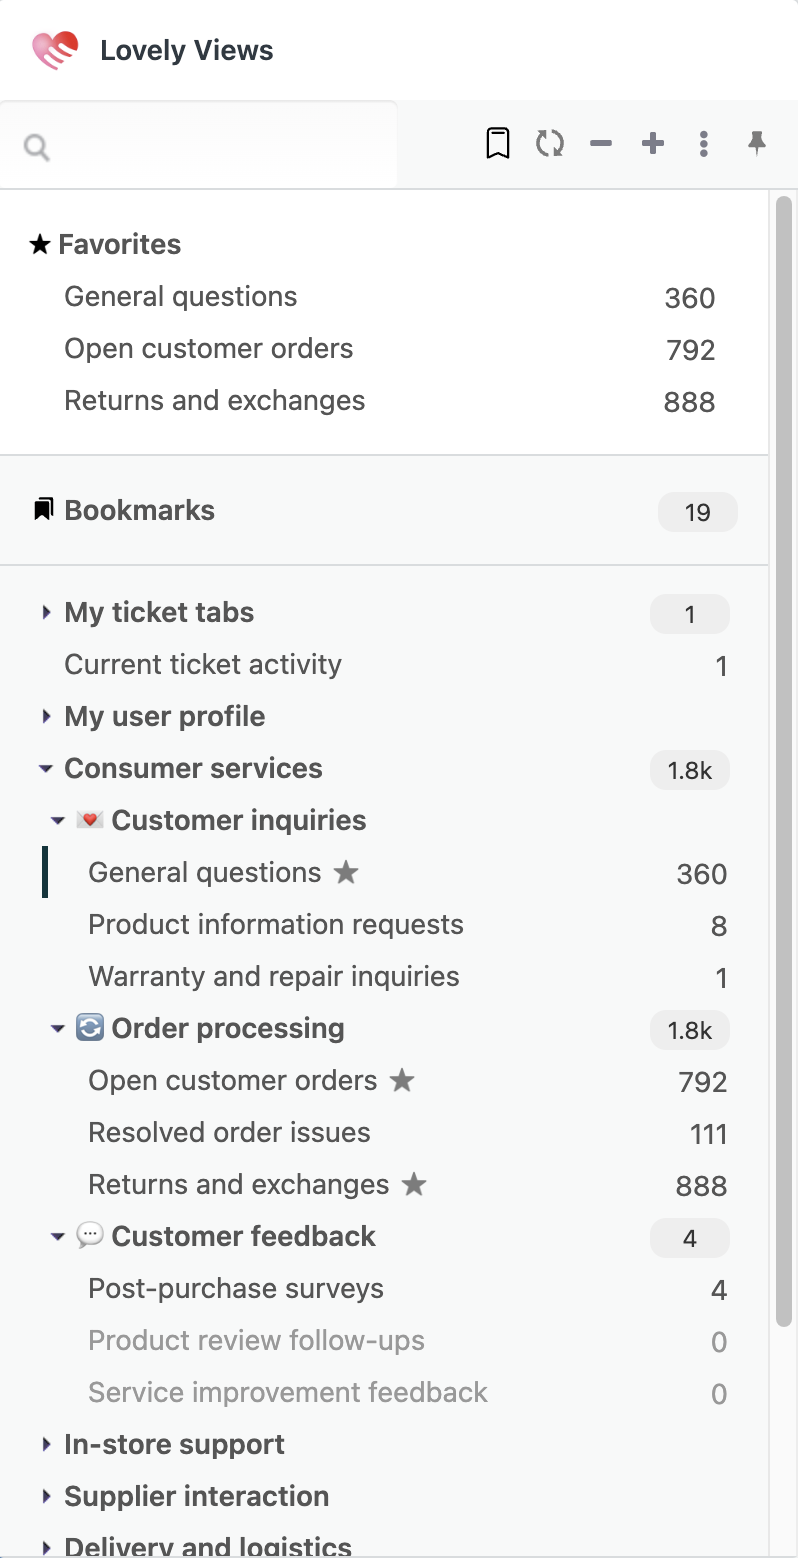
If you favorite a view, a new folder will appear, called Favorites. For this to work, make sure Favorites is enabled in your preferences.
Here is an example, with two views that have been favorited:
You can make changes to the default folders in the Views list section of Preferences.
Check out the Default folders section for more information and usage tips.
Ticket counts
Next to each view or folder in the views list pane, a ticket count is displayed. This number indicates the current amount of tickets associated with that specific view or folder. At a glance, you can gauge your workload and prioritize the tickets that need immediate action. These ticket counts offer a real-time snapshot of your queue, allowing for better resource allocation and time management.
Views list controls
Directly above the views list pane in the interface of the main Lovely Views app, you will find the views list controls. These icons serve as interactive buttons that allow you to customize and manipulate the views and tickets displayed.
Search (Magnifying glass)
Function: Initiates a keyword search within the views list pane.
Usage: Quickly locate specific views or folders by inputting search terms.
Bookmark
Function: Access via the top toolbar. Easily bookmarks a ticket in view for quick future access.
Usage: Mark important tickets for easy retrieval, helping prioritize critical issues without extensive searching.
Home
Function: Returns the user to what they've set as Home view.
Usage: Quickly navigate back to your starting or most central view with a single click.
Refresh views (Two circular arrows)
Function: Manually refreshes the content of the views list pane.
Usage: Ensure the views list pane reflects the most current data, especially after changes have been made.
Collapse all groups (Minus sign)
Function: Collapses all expanded view categories in the views list pane.
Usage: Streamline the views list pane by collapsing all categories for a simplified overview.
Expand all groups (Plus sign)
Function: Expands all collapsible view categories in the views list pane.
Usage: Get an expanded view of all categories and subcategories at once for easy access.
Menu (Three dots)
Function: Opens the settings or preferences menu for Lovely Views.
Usage: Adjust your view settings and ticket-listing preferences to better suit your workflow.
Hide (Left arrow)
Function: Collapses the views list pane on the left to increase the viewing area of the ticket list on the right.
Usage: Focus on the ticket list without the views list pane when you need an unobstructed view of your tickets.
Show (Right arrow)
Function: Keeps the views list pane on the left expanded to display the full ticket management interface.
Usage: Reveal the views list pane when more detailed navigation through views or tickets is needed, providing full access to all ticket management options.
Pin
Function: Keeps the Lovely Views app open in the top toolbar after selecting a view or bookmark.
Usage: Maintain quick access to the Lovely Views interface while navigating through different views or bookmarks, ensuring the app remains active and accessible.
Remember that these controls are designed to enhance your ticket management experience, providing quick access to commonly used functions. Become familiar with each of these icons for a more efficient navigation and management process within Lovely Views.
Ticket list pane
The ticket list pane is where you can manage and monitor a host of customer-related issues. It provides an interactive and efficient interface for ticket management.
Instant overview
Tickets are displayed in a table layout, each row depicting an individual ticket. Essential information such as status, subject, requester, and assignee are immediately visible, enabling quick assessment and action.
You can select and order columns that appear per view through Zendesk's native view configuration settings. Here is how you can customize your ticket table columns:
1. Navigate to the Admin Center in your Zendesk environment.
2. Within the Admin Center, select Agent tools followed by Views. This area governs how tickets are displayed in various views.
3. In the Views section, find Formatting options. Here, you can choose up to 10 columns to appear in your views. The options include but are not limited to subject, requester, request date, ticket type, and priority.
4. Click Add column to include additional data fields in your ticket table view.
5. Use the drag-and-drop feature to reorder the columns according to your preferences, ensuring the most critical information is prominent.
6. Confirm and save your changes, then reload Zendesk to update the ticket list in Lovely Views accordingly.
By tailoring the columns, you can optimize the ticket table to align with your monitoring and response strategies. Keep in mind that these settings may affect all agents who use the same view, so consider making changes that will benefit your team's collective efficiency.
Remember, Lovely Views is designed to complement Zendesk's robust functionality. Utilizing the strengths of both platforms will provide you with a powerful and personalized ticket management system.
Real-time updates
The ticket list is dynamic and updates in real-time, ensuring you're always working with the latest ticket information. As the status of tickets changes or new tickets come in, the list will refresh to keep you up to date without needing to manually reload the page.
Enhanced previews
Hover over a ticket to reveal a detailed preview, providing you with quick insights without the need to open each ticket individually.
Selection checkboxes
When you need to apply actions to multiple tickets, use the checkboxes to select them. Once selected, you can perform various bulk actions, such as marking tickets as solved or deleting them. This feature is accessible through the controls at the bottom of the ticket list, streamlining mass updates to save time and effort.
View controls
The view controls are a set of interactive elements located above and below the ticket list in Lovely Views. These tools provide you with the means to refine, update, and navigate your views with ease.
Above:
Below:
Let's proceed and detail the functionality and usage of each control.
Filter
Purpose: To display only tickets that meet certain criteria within your views.
Usage: Click on the filter icon to apply predefined filters or create custom filters for your ticket list. Filters can be based on tags, status, satisfaction, requester, request date, and assignee, and more filters will be available soon.
Auto-refresh
Purpose: To ensure that the ticket list is automatically updated at regular intervals.
Usage: Toggle the auto-refresh switch to enable or disable the periodic updating of your ticket list without manual intervention.
Wrap
Purpose: To control the display of ticket titles and content in the ticket list.
Usage: Select the wrap option to choose between a wrapped view, which shows all content, and a single-line view, which truncates longer text for a cleaner look.
Show: Unread
Purpose: To filter the ticket list to show only unread tickets.
Usage: Click to toggle the display of tickets. When enabled, only tickets with unread updates or comments will be displayed, allowing you to quickly identify which tickets require your attention.
Search all tickets
Purpose: To find specific tickets using keywords or phrases.
Usage: Enter your search terms in the provided field to locate tickets across all views that contain the specified text.
Settings dropdown
Purpose: To access a range of settings and preferences for Lovely Views.
Usage: Tailor the interface and functionality to better fit your workflow.
Clicking the dropdown arrow (top-right) unveils the following options:
Favorite this view - Mark a view as a favorite for quick access.
Set as Home view - Designate as primary view that you'll be directed to upon opening Lovely Views.
Export as CSV - Conveniently export the current view's ticket list for data analysis or record-keeping purposes.
Extra view settings - Dive into additional settings for further customization of your current view. Custom values for tickets per page for the particular view (such as 11, 58, etc.), which aren't available in the Pagination for navigation at the bottom of the view, can also be set here.
Rename view - Update the name of the view to reflect its content or your organizational changes. Press enter or click the green check to save. Click the 'no' symbol to cancel.
Edit view - Modify the conditions and filters of the view in the Zendesk Admin Center to better suit your evolving needs. More information can be found at Zendesk - Editing a view.
Clone view - Create a copy of an existing view in the Zendesk Admin Center, preserving the view's settings and filters for a new, similar category. More information can be found at Zendesk - Cloning a view.
Show standard view - Switch back to the Zendesk's default view presentation.
Select all tickets on page
Purpose: Efficiently manage large volumes of tickets by selecting all tickets on a page for bulk actions.
Usage: Click the checkbox at the top-left corner of the ticket list pane to select all tickets on the current page. Use the options at the bottom of the pane to clear, edit, merge, mark as spam, open, mark as read/unread, bookmark, or delete the selected tickets (for admins and roles that allow deletion), or even select all pages.
Pagination for navigation
Purpose: Located at the bottom right of the ticket list, use to navigate between pages of tickets and set number of tickets per page.
Usage: Use the dropdown to set your preferred number of tickets per page (choose from 30, 40, 50, 100, 150, or 200), then use the pagination controls to move to the next page, previous page, first, or last set of tickets in the list, enabling you to browse through large numbers of tickets systematically.
Each of these controls is designed to make your ticket management process more targeted and less time-consuming, allowing you to focus on delivering exceptional support. Familiarize yourself with these controls to enhance your daily operations within Zendesk.
Default views
Default views in Lovely Views are designed to enhance your ticket management efficiency right from the start. They provide pre-configured filters to address common ticket scenarios, ensuring you can immediately begin managing your workflow effectively.
Bookmarks
View all tickets you've personally bookmarked for quick access. This view helps you discreetly manage crucial or frequently accessed tickets.
- Ideal for keeping track of high-priority or complex issues.
- Bookmark tickets during reviews for follow-up without searching through your entire ticket load.
My ticket tabs
Displays the tickets you have opened in tabs. This convenient view allows you to easily return to specific tickets you're actively working on.
- Useful for multitasking or when pausing work on a ticket to return to later.
- Helps maintain a clear workflow by organizing your currently active issues.
Assigned
Lists all tickets currently assigned to you, providing a clear snapshot of your immediate responsibilities.
- Check regularly to update progress and prioritize tasks.
- Essential for daily planning and ensuring timely responses to assigned tickets.
Requested
Contains tickets that you have created or requested. Acts as a personal tracker for issues you're directly involved in.
- Monitor the progress of your requests to stay informed on resolution timelines.
- Useful for tracking responses and updates to your inquiries.
Followed
Includes tickets you are following. This view is useful for staying updated on tickets that involve multiple departments or have significant relevance to your work.
- Opt to follow complex or cross-departmental tickets to receive updates without primary responsibility.
- Keep informed about developments in areas of interest or expertise.
CC'd
Shows tickets where you are included as a Carbon Copy (CC) recipient. This view is beneficial for monitoring discussions that may require your input.
- Review to understand the context or prepare for potential involvement.
- Ensure you’re informed about discussions where your expertise may be needed.
Current ticket activity
Provides real-time updates of all user activity on tickets. By default, admins have access to this view. However, it can now be enabled for specific roles or groups, allowing broader access to users. Administrators can configure access by selecting the desired roles or groups under the settings.
- Monitor this view regularly to gain insights into the current ticket handling performance and spot any unusual patterns or bottlenecks in real-time.
- Use the data to adjust resources or provide immediate assistance where ticket volumes are peaking or particular issues are recurring.
Suspended
Holds tickets that are suspended, requiring review or action to return to the workflow, vital for managing exceptions and workflow interruptions. You can set this as admin-only view or allow for agent access.
- Regularly review suspended tickets to determine whether they should be reactivated, remain suspended, or escalated for further action.
- Train your team to understand the reasons for ticket suspension to prevent legitimate customer interactions from being delayed.
Deleted
Where tickets that have been removed from active lists reside, allowing for a review and possible restoration if removed in error. You can set this as admin-only view or allow for agent access.
- Periodically check the deleted tickets to ensure no ticket has been mistakenly removed from the active workflow, safeguarding against accidental data loss.
- Use this view as a last step in a comprehensive ticket audit to confirm that deletion was appropriate and necessary, or to restore any ticket that was removed prematurely.
Managing views
Lovely Views enhances your ticket management experience by offering powerful tools for managing views. This section provides instructions on how to add, edit, and delete views within the application.
Add a view
To add a new view in Lovely Views:
1. Click Menu from the views list controls.
2. Select Add view.
3. You will be redirected to the Zendesk Admin Center where you can specify the criteria for the new view. This includes the view’s name, conditions for filtering tickets, and sorting preferences. More information on adding a view can be found at Zendesk - Creating views.
4. Once you’ve configured the settings, click Save to create the new view.
5. Reload the Zendesk page for your new view to be available in the views list pane, ready for you to select and manage tickets as per the defined criteria.
Rename a view
Update the name of the view to reflect its content or your organizational changes:
1. Click the view you want to edit from the views list pane. The view will then open up on the ticket list pane.
2. Click the settings dropdown and select Rename view.
3. Edit the name, then click the green check to save. Click the 'no' symbol to cancel.
4. The new name will now appear for the view.
Here's another way to rename the view:
1. Click the view you want to edit from the views list pane. The view will then open up on the ticket list pane.
2. Hover over the view name in the view controls, and click Rename view.
3. Edit the name, then click the green check to save. Click the 'no' symbol to cancel.
4. The new name will now appear for the view.
Edit a view
Editing an existing view is straightforward:
1. Click the view you want to edit from the views list pane. The view will then open up on the ticket list pane.
2. Click the settings dropdown and select Edit view.
3. Modify the view’s settings as necessary, such as changing its name, conditions, or sort order. More information can be found at Zendesk - Editing a view.
4. After making your changes, click Save to update the view.
5. Reload the Zendesk page for the updated view to appear in the views list pane.
Favorite a view
Keep your most frequently used views prominently placed for quick access. Favorites ensure that your essential tools are always ready, accelerating your daily tasks.
To access this setting:
1. Open your desired view in Lovely Views, and click the settings dropdown in the top-right corner. Choose Favorite this view from the options.
2. A checkmark will appear next to Favorite this view in the dropdown menu, indicating that the view is now favorited.
3. The view will now be added to your Favorites folder, making it easily accessible for future use.
Set as Home view
Set a view as your default to quickly access it with a single click of the Home button.
To access this setting:
1. Open your desired view in Lovely Views, and click the settings dropdown in the top-right corner. Choose Set as Home view from the options.
2. A checkmark will appear next to Set as Home view in the dropdown menu, indicating that the view is now favorited.
3. Now, whenever you click the Home button, you'll be directly taken to your designated Home view.
Clone a view
Create a copy of an existing view, preserving the view's settings and filters for a new, similar category.
1. Click the view you want to clone from the views list pane. The view will then open up on the ticket list pane.
2. Click the settings dropdown and select Clone view.
3. The view will open on Zendesk Admin Center. Modify the title, conditions, formatting, and availability as needed. More information can be found at Zendesk - Cloning a view.
4. After making your changes, click Save to update the view.
5. Reload the Zendesk page for the new view to appear in the views list pane.
Deactivate a view
If you need to deactivate a view:
1. Click the view you want to deactivate from the views list pane. The view will then open up on the ticket list pane.
2. Click the settings dropdown and select Edit view.
3. The view will open on Zendesk Admin Center. Click More options (three dots), then select Deactivate view. More information on deactivating a view can also be found at Zendesk - Deactivating a view.
4. You will see a confirmation message that the view has been deactivated.
5. If you click the view again on the views list pane, you will get a notification that it has been deactivated or deleted.
6. Reload the Zendesk page to show the updated views list without the deactivated view.
Reactivate a view
If you need to bring back a deactivated view:
1. Go to your Zendesk Admin Center, click Workspaces, then click Views.
2. Click Inactive.
3. Hover over the view, click More options (three dots), then select Activate view.
4. Reload the Zendesk page to show the updated views list with the activated view.
Delete a view
Only inactive views can be deleted. If you're looking to delete a view, deactivate it first. Once deactivated, here are the steps to delete the view:
1. Go to your Zendesk Admin Center, click Workspaces, then click Views.
2. Click Inactive.
3. Hover over the view, click More options (three dots), then select Delete view. More information can be found at Zendesk - Deleting a view.
4. Click Delete view to confirm permanently removing the view from your account.
5. Once deleted, the view is permanently deleted and will no longer appear in the inactive views list.
Refresh a view
Managing a dynamic ticketing system requires having access to the most current data. Lovely Views ensures that agents can rely on the latest ticket information through its robust refreshing capabilities.
Auto-refresh
Auto-refresh maintains an up-to-date ticket list by automatically updating information at regular intervals. This can be enabled by ticking Auto-refresh in view controls, allowing for periodic, automatic updates without manual intervention.
Lovely Views actively checks for updates to the list of views and ticket totals every 3 minutes by default. Additionally, it listens for real-time ticket changes and refreshes data upon returning to the app from other Zendesk pages.
Admins can customize the auto-refresh rate to dictate the frequency of updates, and they can also choose whether or not agents see auto-refresh in view controls.
Manual refresh
To manually update all views and their ticket counts, click Refresh on your view list controls. This forces Lovely Views to request the latest full list of views and their ticket counts.
For updates on a specific view, double-click on the view name in the navigation panel. This clears the cache for that view and prompts a refresh for the most up-to-date data.
Lovely Views' refresh options empower agents with the flexibility to maintain control over ticket data visibility. Whether it's relying on the consistent cadence of auto-refresh or invoking a manual refresh for immediate updates, agents can ensure that their ticketing workflow remains efficient and informed.
Show only my views
This setting allows users to filter and display only the views that they have created or are specifically assigned to them, thereby simplifying the management of numerous ticket views.
To access this setting:
1. Click Menu from the views list controls.
2. Select Show only my views.
Dark mode
Dark mode is an aesthetically pleasing and eye-friendly visual option that reduces glare and makes the text easier to read. Lovely Views supports a comprehensive dark mode that changes the interface's theme across the app and the sidebars.
For the main Lovely Views app:
1. Click Menu from the views list controls.
2. Select Dark mode or Dark mode (lighter) to switch the app's interface. This will change the background and elements of the Lovely Views app to dark colors.
Dark mode:
Dark mode (lighter):
Enabling Dark Mode enhances the visibility of icons and texts with a high-contrast color scheme, making navigation intuitive and reducing visual fatigue.
For the sidebars:
1. Click Menu (three dots) from the views list controls.
2. Select About / Preferences.
3. Click Browser-device specific.
4. Toggle Dark Mode for sidebar on. Note that this will only work if you already have Dark Mode activated for the main app.
5. Reload your Zendesk page, and your ticket sidebar, as well user and organization sidebars, should now be on Dark Mode for Lovely Views.
The implementation of Dark Mode provides a uniform look that extends from the app's main interface to the various sidebars, ensuring a seamless experience.
Extra view settings
Dive into additional settings for further customization of your current view. Custom values for tickets per page for the particular view (such as 11, 58, etc.), which aren't available in the Pagination for navigation at the bottom of the view, can also be set here.
To access this setting:
1. Open your desired view in Lovely Views, and click the settings dropdown in the top-right corner. Choose Extra view settings from the options.
2. Set tickets per page and how you'd like your views grouped and ordered. Don't forget to click Save to update Lovely Views with changes made.
Continue to Configure advanced sorting for more information on grouping and ordering ticket views.
Configure advanced sorting
Lovely Views gives you more control over how your ticket views are sorted by allowing you to sort by up to three columns. This feature goes beyond the single-column sorting available in standard Zendesk views, helping you manage your tickets more effectively.
To set up advanced sorting:
1. Open your desired view in Lovely Views, and click the settings dropdown in the top-right corner. Choose Extra view settings from the options.
2. The Group by and Order by fields correspond to the format you've already set up in Zendesk's view settings for that particular view.
Here's an example. Zendesk's Group by and Order by settings for the General questions view:
And Lovely Views' corresponding Group by and Order by settings for the General questions view:
This is your primary sorting column.
2. Lovely Views adds two more sorting fields: Order by (2) and Order by (3). Choose the columns you want to use for additional sorting from the dropdown menus and decide if you want them in Ascending or Descending order.
3. Don't forget to click Save.
Example configuration
Let's say you want your tickets sorted first by 'Status', then by 'Updated' date, and finally by 'Priority', all in Descending order. Here’s how you can do it:
1. Primary column:
- Group by: Status
- Order by: Updated (Descending)
2. Secondary column:
- Order by (2): Assignee
- Set the order (Descending)
3. Tertiary column:
- Order by (3): Requester
- Set the order (Descending)
This setup means your tickets will be grouped by their status, then sorted by the most recently updated, and within those groups, further sorted by their assignee and requester.
Benefits of advanced sorting
- Better organization: Keep your ticket views well-organized, making it easier to prioritize and manage your work.
- Increased efficiency: Multiple sorting layers help you quickly spot high-priority tickets and important updates.
-
Customized workflows: Tailor your ticket views to fit your specific workflow needs, ensuring the most relevant information is always at the top.
Additional tips
- Try different combinations: Experiment with various sorting columns to find the best setup for your workflow.
- Update regularly: Adjust your sorting preferences as your team’s priorities change to keep things running smoothly.
- Combine with folders: Use folder organization alongside advanced sorting to create a highly structured and easy-to-navigate ticket management system.
With Lovely Views’ advanced sorting, you can fine-tune how your tickets are displayed, making it easier to stay on top of your workload and ensure nothing slips through the cracks.
Download view list CSV
This is a functional utility that allows users to export a list of views in a CSV (Comma-Separated Values) format. This feature is designed to facilitate the analysis, reporting, and archiving of view-related data outside the Lovely Views environment.
To access this setting:
1. Click Menu from the views list controls.
2. Select Download view list CSV.
Exporting the views as a CSV file is particularly helpful when you need to perform offline data analysis, share view-related information with colleagues who may not have access to Lovely Views, or keep a record of views for audit purposes. It simplifies data manipulation and enables better data portability for administrative and reporting tasks.
Show standard view
Default folders
Default folders help manage views into an easy-to-navigate structure. The default folders are automatically available on your view pane, and are set up to systematically categorize tickets based on common criteria.
You can make changes to the default folders in the Views list section of Preferences.
My user profile
Automatically contains four profile-specific views: Requested, Assigned, CC'd, and Followed. This personal folder centralizes tickets based on your direct involvement, whether you're assigned, have requested, are following, or are CC'd on them.
- Quickly manage tickets linked to your role; prioritize actions based on tickets in the Requested, Assigned, CC'd, and Followed views.
- Stay organized by routinely monitoring and addressing updates in this folder to ensure nothing slips through the cracks.
Misc
Suspended and deleted views appear here. This is also a default catch-all folder for views that are not assigned to any specific category. It helps keep your views list organized by grouping miscellaneous views together.
- Regularly check this folder to ensure it doesn't become cluttered with miscellaneous views that could be better organized elsewhere.
- Consider creating new folders or reassigning views to maintain a streamlined workflow and better categorization.
Personal
Separately groups your personal views from shared or public views, allowing for quick access to the views you've customized or use frequently.
- Tailor your personal views to suit your daily operations; use this folder for quick access to your specialized workflows.
- Regularly update and refine personal views to enhance accessibility and relevance to your tasks.
Favorites
Appears when you mark a view as a favorite, providing quick access to your most-used views. Ensure the Favorites feature is enabled in your preferences to use this folder.
- Mark your most frequently accessed views as favorites for quick retrieval, saving time and enhancing workflow efficiency.
- Review and update your Favorites regularly to ensure they align with your evolving priorities and workflow changes.
Organizing views into folders
Lovely Views enhances your ticket management system by introducing an organized, hierarchical structure to your views. Folders and subfolders allow you you to categorize and navigate through large numbers of views effortlessly. They help in maintaining a clean and structured interface, which is crucial for quick access and less cognitive load.
Create a folder
To organize a large number of views into folders effectively, you can use the double colon (::) as a separator when naming your views in Zendesk. This separator helps you create different levels of hierarchy, such as Folder::Sub-folder::View name.
For example, if you want to create a folder named "Support" with a sub-folder "Level 1" that contains the view "Open Tickets", you would name your view as "Support::Level 1::Open Tickets". This structure places the 'Open Tickets' view within 'Level 1' of the 'Support' category.
You can extend this hierarchy to accommodate more levels as needed. For instance, naming a view "Support::Hardware::Printers::Urgent" will create a three-level hierarchy under 'Support' specifically for urgent printer-related tickets.
Here’s how you can set this up in Zendesk:
- Navigate to your Zendesk Admin Center.
- Click on "Manage" and then select "Views".
- Choose to add a new view or edit an existing one.
- In the view name field, enter the desired hierarchical structure using double colons, e.g., "Support::Level 1::Open Tickets".
- Configure the rest of your view settings and click "Save".
This will automatically create the folders and sub-folders based on the naming structure you’ve entered, helping you manage your views more efficiently.
Locate a folder
Within the views list pane, folders and sub-folders are structured as per your defined hierarchy. If you're looking for a particular folder or sub-folder, you can scan through the list where they are displayed in their respective hierarchies. Each will be clearly labeled and distinguishable, enabling you to quickly identify and select the folder of interest without expanding it immediately.
Expand and collapse a folder
Use the arrows next to the folder or sub-folder names to expand or collapse categories, making it easy to manage large sets of views.
Add a view to an existing folder
Integrating a view into an existing folder streamlines your ticket management, ensuring a tidy and efficient interface.
1. Within the views list pane, identify the view you want to integrate into a folder or sub-folder structure.
2. Hover over the view name in the view controls, and click Rename view.
3. Modify the view's designation to nest it within the folder. Append the folder's hierarchy before the view's name using double colons (::) to signify its position in the structure. Confirm the new hierarchy by pressing Enter or clicking the confirmation icon to save the changes.
For example, to place the "Pending follow-up" view into the "Level 1" sub-folder which is under "Support", rename it to "Support::Level 1::Pending follow-up".
Note: When nesting a view in a sub-folder, remember to reference the parent folder followed by the sub-folder in the name, using the double colon notation to delineate the hierarchical path.
New saved name:
New views list:
Remove a view from a folder
If a view no longer belongs in a folder or if you're restructuring your categories, you may need to remove it from its current location.
1. Click the view you intend to remove within the folder hierarchy.
2. Hover over the view name in the view controls, and click Rename view.
3. Delete the folder part of the name. For instance, change "Support::Level 1::Pending follow-up" to "Pending follow-up" to remove the view from both the "Level 1" sub-folder and the "Support" folder.
4. Apply the new settings by clicking the green check icon or pressing Enter. The view will be repositioned in the views list according to its updated name.
Move a view to a different folder
To re-categorize a view under a different folder:
1. From the views list pane, click the view you're looking to move.
2. Hover over the view name in the view controls, and click Rename view.
3. In the view's name, adjust the folder hierarchy. For instance, change "Support::Level 1::Pending follow-up" to "Support::Level 2::Pending follow-up" to move the view from the "Level 1" to the "Level 2" sub-folder.
4. Save your edits by clicking the green check icon or pressing Enter.
5. The view will be repositioned in the views list pane. In our example, it has moved from the "Level 1" sub-folder to the "Level 2" sub-folder, while still remaining inside the "Support" parent folder.
Delete a folder
A folder is automatically removed once it no longer contains any views or sub-folders.
1. Individually remove all views and sub-folders from the folder you intend to delete.
2. Once the folder is empty, it will automatically be removed from the views list.
3. If the folder still shows, reload Zendesk to update the views list pane.
Best practices for folders
Consistency - Ensure consistency in naming conventions across your organization to avoid confusion.
Categorization - Group views logically based on their function, urgency, or any other criteria that suits your team's workflow.
Simplification - Do not overcomplicate the hierarchy. Too many folder levels can become counterproductive. Aim for a balance between depth and simplicity.
Benefits of folders
Improved organization - Folders and sub-folders bring a significant level of order and categorization to your ticket management system.
Quick access - They enable you to find and access the views you need promptly, without the need to sift through a long, flat list.
Flexibility - As your organization evolves, so can your view structure. Easily add, remove, or modify the folder to adapt to changes.
By leveraging folders and sub-folders in Lovely Views, you can dramatically enhance the ticket management process, making it easier for agents to prioritize their work and respond to tickets efficiently.
Managing tickets
Lovely Views simplifies the ticket management process, providing an array of features designed to enhance how you interact with and handle tickets within Zendesk.
Preview a ticket
Gain instant insights into ticket content without leaving your current view. Hover over a ticket to activate the preview pane, revealing key information and recent communications. Utilize the preview to quickly assess the ticket's context and urgency, streamlining your decision-making process.
Regular preview
The regular preview in Lovely Views builds upon the Zendesk standard by revealing all ticket comments in chronological order, providing a more comprehensive understanding of the ticket's communication thread. Unlike the standard previews, which only show the first and last comment, Lovely Views keeps you better informed with a full comment history, which you can access by scrolling down through the preview box. The preview remains visible for as long as your cursor stays over it, giving you the time to review the ticket details without clicking away.
Enhanced preview
The detailed ticket previews take it a step further by incorporating a wealth of information that helps you make informed decisions and actions without having to navigate away from the current view. Gain insights into more nuanced details such as the user information, the channel of ticket submission, associated tags, and exact timestamps for ticket creation and updates. Execute actions - bookmark, mark as read/unread, identify spam, or delete (if your role allows for it) - on the spot. Copy links and access profiles for requesters, their organization, and all related users directly, enhancing efficiency within your view. Like the regular previews, the detailed view remains on the screen as long as you hover over the ticket, ensuring you have all the time you need to absorb the information.
Also, if you have agent collision indicators enabled, you can quickly check if other agents are viewing the ticket or have it open. If the avatar is at full opacity, this means the agent is viewing the ticket tab.
If the avatar is at lower opacity, this means the agent has the ticket open but not currently viewing the ticket tab.
Lovely Views allows for customization of ticket previews to suit your needs. You can choose between regular and enhanced previews based on the depth of information required for your workflow. The setting can be easily toggled within the general preferences of Lovely Views, ensuring that your ticket preview experience aligns with your work habits and preferences.
Select a ticket or apply bulk actions
Selecting a ticket allows for processing or detailed examination, enhancing your efficiency.
Apply bulk actions to multiple selected tickets with just a few clicks.
Utilize bulk actions for efficient ticket management, especially when dealing with high volumes of tickets. This can include bulk marking tickets as read after a major update or merging duplicate tickets reported by multiple users.
Clear
Quickly deselect any highlighted tickets to reset your selection, allowing you to start a new batch action or refine your choices.
Edit
Modify selected tickets in bulk, such as changing their status, assignee, adding tags, or even applying a macro, directly from the main interface.
Merge
Combine selected tickets into a single ticket to consolidate similar issues or requests, ensuring a unified response strategy.
If you click Merge, you will be presented with two options:
Standard merge - This is the same as merging tickets from the regular Zendesk views interface. The selected tickets are all closed and merged into an existing ticket.
When you choose Standard merge, the first step is to choose a target ticket. This can either be one of the tickets you selected, or you can search for another ticket.
If you click Search for a ticket, you're presented with a search box. Enter a ticket id or a keyword or phrase.
The results will only include valid un-closed tickets.
Clicking a ticket will designate it as the target ticket that the other tickets will be merged into. Clicking the ticket a second time will de-select it as the target. Once a target is selected, the comment boxes will be shown.
The first text box is the comment that will be added to the 'source' tickets. The comment is automatically generated based on the target ticket you choose, but you can customize it to your liking.
The second text box is the comment added to the target it ticket, also customizable. If you change the target ticket, both comments will be regenerated and any edits you've done will be lost.
You can also choose not to add a comment to either the source tickets or target ticket by checking the check box below the comment box. This will prevent the message from being added when the merge is performed.
Clicking the Confirm and merge button will start the process. A throbber/loading icon will display and when the process is complete, the pop-up will close and the view (or search results) will refresh.
Custom merge - This feature offers the flexibility to include comments from selected tickets into a newly merged ticket. It prompts you each time you initiate a merge, allowing you to specify if and how you wish to incorporate existing ticket comments.
Upon initiating a custom merge, a dialog appears, providing agents with options on how to consolidate the tickets effectively. Here, you can determine the primary source from which the new, unified ticket will derive its data.
The different custom merge options are:
Don't copy anything - As straightforward as it gets—no data from the original tickets are carried over to the newly merged ticket.
Most recently updated ticket - The system selects the ticket with the latest updates as the primary source, ensuring the most current information is preserved.
Roll up: Starting with data from the least recently updated ticket, the system sequentially updates the information with data from more recently updated tickets, compiling a comprehensive overview.
Specify by ticket ID: Offers the precision of choosing exactly which ticket’s data you wish to use as the foundation for the merged ticket.
Lovely Views also provides app settings for merging:
Requester must be the same when merging tickets
Custom merge method
Force custom merge method onto agent
Add temporary tag while merging
These options provide the necessary control to tailor the merging process to your specific needs, ensuring the integrity and relevance of the information in the newly created ticket.
Mark as spam
Identify and mark irrelevant or malicious tickets as spam, removing them from your active ticket list and improving overall ticket hygiene.
Open
Access the full ticket interface for more in-depth actions or to provide detailed responses to the requester.
Mark as Read/Unread
This function allows you to quickly manage the read status of your tickets, ensuring that your ticket list reflects the most current state of your workflow.
Mark as read - Selecting this will change the status of the chosen tickets to 'Read', indicating that you have acknowledged or reviewed the ticket contents. It's useful for keeping your ticket list organized and focusing on tickets that still require your attention.
Mark as unread - Conversely, you can revert the status of the tickets to 'Unread'. This is particularly helpful if you've reviewed a ticket but want to mark it for follow-up or additional review later on.
Bookmark
Bookmarks allow agents to privately flag and swiftly access tickets that need special attention or frequent review via their own personal Bookmarks view, while keeping these markers visible only to the individual agent.
Hover over the left side of a ticket list to reveal and click the Bookmark icon:
Clicking the Bookmark icon turns it purple, indicating the ticket is now in your Bookmarks view:
You can also use the bulk action option for bookmarking:
Add bookmarks - This will add a bookmark icon next to the ticket for you, and the ticket will also be added to your personal Bookmarks view for easy access.
Remove bookmarks - This will remove the bookmark icon next to the ticket, and the ticket will also be removed from your personal Bookmarks view.
If you've added a bookmark button to the sidebar, you can click the Bookmark icon on the ticket sidebar:
Clicking the Bookmark icon turns it purple, indicating the ticket is now in your personal Bookmarks view:
The bookmark functionality is designed to fit seamlessly into your daily ticket handling processes, ensuring that tickets of note are always just a click away and visually distinguishable to each agent personally with the bookmark icon, as well as stored in their own personal Bookmarks view that no other agent can see, enabling agents to prioritize and manage their individual workload more effectively.
Delete
Delete resolved or unnecessary tickets from your list to maintain focus on active concerns. This option is only available if your role allows for ticket deletion.
Select all pages
Select every ticket within the current view, across all pages, not just the tickets displayed on the current page. This enables you to apply bulk actions to all tickets in the view without having to navigate through each page individually.
Once the Select all pages button is clicked, it will show the total number of tickets selected (for example, 366 tickets selected - ALL TICKETS on all pages). You can then click any of the bulk action buttons to apply: Clear, Edit, Merge, Mark as spam, Open, Mark as read/unread, Bookmark, or Delete (if your role allows for it).
Warning: When using the Select all pages feature, be mindful of the bulk actions you apply. Since this feature affects all tickets within the current view, any changes will be applied to a large number of tickets. Ensure that the action you intend to perform is appropriate for all selected tickets to avoid unintended consequences.
Best practices for managing tickets
Efficient ticket management is key to delivering high-quality customer service. Lovely Views offers features that not only enhance the Zendesk environment but also promote best practices in ticket management. Here are some best practices to consider:
Use folders and sub-folders
Group tickets logically by type, urgency, or customer, facilitating quick access and prioritization.
Utilize bulk actions
Take advantage of bulk actions for repetitive tasks. This feature is a time-saver and reduces the risk of human error.
Regularly update ticket information
Keep ticket information up to date with the auto-refresh feature, ensuring you're always acting on the latest data without the need for constant manual checks.
Maximize ticket previews
Use ticket previews to quickly assess a ticket's details without opening it, which streamlines the review process and saves time.
Customize views
Personalize views by selecting relevant columns and ordering them to fit your needs, ensuring the most pertinent information is immediately visible.
Keep a clean workspace
Regularly archive or delete resolved tickets to keep your workspace clutter-free and maintain focus on outstanding issues.
Bookmark frequently used tickets
Utilize the bookmarking feature to instantly bookmark tickets for your eyes only, ensuring your important tasks remain private and prioritized in your workflow.
Train and collaborate
Ensure all team members are trained on Lovely Views features. Collaboration is key, and understanding how to use the tool effectively ensures a consistent approach to ticket management.
By integrating these best practices into your daily routine, you not only enhance your efficiency but also significantly improve customer service quality.
Benefits of good ticket management
Good ticket management practices yield tangible benefits for both the support team and the customers they serve. Here are some of the advantages:
Increased efficiency
By using Lovely Views to manage tickets effectively, agents can handle issues faster, leading to increased overall team productivity.
Enhanced customer satisfaction
Quick and organized responses to tickets contribute to better customer experiences and increased satisfaction.
Reduced response times
Effective management means that urgent tickets are escalated promptly, reducing response times and preventing issues from being overlooked.
Improved resolution rates
With organized views and easy access to ticket information, agents can resolve issues more accurately and consistently.
Streamlined processes
Lovely Views’ interface and functionalities streamline ticket management processes, reducing the time spent on administrative tasks.
Better prioritization
The hierarchical view system allows for better ticket prioritization, ensuring critical issues receive immediate attention.
Clearer analytics
With a well-managed ticket system, reports and analytics become more meaningful, providing clear insights into support performance and customer needs.
Reduced stress
An organized ticket management system can reduce the stress levels of support agents, leading to a more pleasant work environment and less burnout.
Effective ticket management translates into satisfied customers and a trusted brand—vital assets for any business.
Tracking updates
Stay informed about the latest updates and news in Lovely Views.
About / News
Navigate through the latest updates, news, and essential information about Lovely Views in the About / News section. Stay informed about new features, announcements, and any pertinent details related to the app's functionality. This section serves as your reference point for staying up-to-date with the latest developments and insights.
To access this section:
1. Click Menu (three dots) from the views list controls.
2. Select About / Preferences.
3. Click About / News.
This page is divided into three areas: the About section, the Help section, and the News & Announcements section.
About
This section provides detailed information, including the current Lovely Views version, app ID, installation ID, installation date, and the date of the last update, offering a comprehensive overview of your Lovely Views setup.
Help
Get quick access to Lovely Views resources with links to the User guide, Release notes, and Support.
News & Announcement
Stay informed and up-to-date with the latest news and announcements. This section is further divided into four tabs: Latest, Lovely Views, Release notes, and Status.
Latest
Click the tab to show all Lovestock & Leaf updates, with the most recent news showing at the top. This includes announcements, release notes, service incidents and fixes.
Lovely Views
Click the tab to read in-depth announcements about new features or enhancements for Lovely Views.
Change log
Click the tab to see a general overview of app changes and updates.
Status
Click the tab to check for any known Lovestock & Leaf issues or incidents and their causes. If resolved, the status is updated with the date and time of fix.
New settings
Explore recently added or updated settings along with their respective dates on this page.
To access this section:
1. Click Menu (three dots) from the views list controls.
2. Select About / Preferences.
3. Click New settings.
Simply click on the setting name to be directly directed to its location within the preferences, streamlining your navigation and providing quick access to the settings you need.
Personal preferences
With just a simple switch, you can customize your ticketing environment to better suit your visual preference.
Personal preferences - Browser-device specific
These settings are unique to your user account and the specific web browser on your device. This ensures that your preferences remain consistent every time you log in from the same browser. If you switch to a different browser or device, you'll need to activate the settings again to maintain the same visual experience across different workstations.
To access this section:
1. Click Menu (three dots) from the views list controls.
2. Select About / Preferences.
3. Click Browser-device specific.
Dark Mode for sidebar
Switch it on to apply Dark Mode to the ticket sidebar, as well as user and organization sidebars.
This setting ensures visual consistency with Dark Mode in the main Lovely Views app.
Here is what Dark Mode looks like for the ticket sidebar:
You can revert to the original theme by deselecting Dark Mode in the app menu or toggling off the Dark Mode for sidebar.
Customizing preferences
You have a suite of customizable settings tailored to optimize your Lovely Views experience. This is where you can fine-tune how you interact with ticket views, manage tickets, and handle agent workflows. Each section – General, Views list, Selected tickets, Agent collision, Ticket sidebar, Top toolbar, and Backup & Restore – provides specific options that allow you to control different aspects of the Lovely Views interface and functionality, ensuring the tool works just right for your team's needs.
Preferences - General
Admins have access to settings designed to personalize and optimize the ticket management experience. Here, you can tailor how ticket information is presented and interacted with, ensuring that the interface aligns with your specific workflow requirements. Whether it’s setting up the default appearance of the tickets list, managing sorting preferences, or enabling useful shortcuts, these settings empower agents to work more efficiently and effectively.
Title
This allows you to customize the name of the Lovely Views app as it appears within your Zendesk environment. This feature is particularly useful for branding purposes.
Auto-open on startup
This allows you to control the behavior of the app when Zendesk starts up. This setting is beneficial for ensuring that agents can immediately access Lovely Views without manual navigation, streamlining their workflow right from the beginning of their shift.
Options include:
Never - Selecting this ensures that Lovely Views does not automatically open when you start Zendesk. It's ideal for those who prefer to access the app on an as-needed basis.
For all agents - This option will automatically open Lovely Views for every agent when they start Zendesk. It's useful if the use of Lovely Views is integral to the daily operations of your team.
Allow agents to choose - This setting empowers individual agents to decide whether Lovely Views opens automatically when they log in to Zendesk. It offers flexibility and personalization for each agent's preferred workflow.
Tickets per page
This is designed to customize the ticket viewing experience by adjusting the number of tickets displayed on each page within a view. It helps in managing the volume of tickets an agent can see at once and ensures that the ticket list is not overwhelming, especially when dealing with large numbers of tickets.
By default, Lovely Views is set to show 30 tickets per page. This default setting is a balanced choice for clarity and efficiency without overloading the ticket list view.
The input field allows you to set a specific number of tickets to be displayed per page. This can be any number between 5 and 200, giving you a wide range to choose from based on your needs and preferences.
Enable tickets per page customization
This setting gives individual agents the freedom to personalize their interface by choosing how many tickets are displayed per page in each ticket view. When this feature is enabled, agents have the ability to set a preferred ticket count for viewing, providing flexibility in managing their ticket queue.
Show ticket preview
This allows you to enable or disable ticket previews for users.
Options include:
All admins & agents - When this option is selected, both administrators and agents have the ability to view a quick preview of the ticket details by hovering over a ticket in the ticket list. This can be helpful for a quick glance at the ticket without having to click into it fully, saving time and effort for frequent ticket reviews.
Admins only - Choosing this setting reserves the ticket preview functionality solely for admin-level users, possibly to maintain a cleaner interface for agents or to limit quick access to ticket information based on role.
Disabled - If this option is chosen, the ticket preview function is turned off for all users. This could be useful for organizations that prefer their agents and admins to access ticket details in a full window to ensure comprehensive review.
These options provide a way to control quick access to ticket information, which can enhance workflow efficiency and focus by catering to the specific needs of the team’s ticket management process.
Enable 'enhanced' ticket previews
This setting enhances the standard ticket preview by displaying additional, more detailed information.
When the enhanced preview feature is turned on, which is the default state, hovering over a ticket in the list will bring up a preview containing this extended information:
Assigned agent - You can see which agent is currently handling the ticket.
Date created - The date and time the ticket was initially submitted.
Date updated - The most recent date and time the ticket was updated.
Tags - Any tags associated with the ticket to categorize or identify it according to the workflow.
It’s an invaluable feature for users who need more context about a ticket quickly without opening it fully, thus optimizing the ticket management process.
Additional view grouping separator
This allows users to define a custom separator symbol that organizes views into a hierarchical structure. By default, Lovely Views uses double colons (::) to denote parent-child relationships between views. If a user prefers a different symbol, such as a forward slash (/), this setting provides the flexibility to specify that alternative. Any symbol entered in this field will be used in addition to the default double colons, enhancing the app’s ability to distinguish between parent group names and their corresponding views.
Number of lines to display per ticket row
This allows you to customize how much text from ticket fields is visible in the ticket table on the main interface. When set to '0', it offers unlimited text wrapping within each ticket row, meaning that all content will be displayed regardless of length, which could lead to very tall rows if tickets have a lot of text. Conversely, setting this option to '1' will limit the display to just a single line per ticket property, truncating longer text fields and preserving the row's compactness. This is beneficial for users who prefer a tidier look and want to see more tickets at once without extensive scrolling.
Use 12 hour (AM/PM) for times
This allows agents to switch the display format of time entries within the application from the 24-hour clock to the 12-hour clock, which includes AM and PM indicators. This option caters to personal or regional preferences for time format, ensuring that agents can work with the time display that is most intuitive and clear for them. When this setting is activated, all time-related information presented in Lovely Views will adjust to the 12-hour format by default.
Show 'First' button
This gives you the option to display a "First" button in the pagination controls. This button allows users to quickly navigate back to the first page of tickets in the current view with a single click, which can be particularly useful when working with views that contain a large number of tickets across multiple pages. When this setting is turned on, the "First" button becomes visible and is accessible at the bottom of the ticket list, providing a shortcut to return to the start of the list.
Show 'Go to Play' button
This enables a specific button that, when clicked, takes users directly to the "Play" mode in Zendesk. This mode allows agents to work through tickets in their views one by one in the order set by the view's configuration, typically used to ensure that tickets are addressed in a sequential and systematic manner.
Enabling this button provides a convenient and quick way for agents to jump into action, streamlining their workflow and reducing the time spent navigating through the interface to start processing tickets.
Enable Guided mode
This allows administrators to determine whether agents have a structured progression for handling tickets. When this feature is turned on, agents with roles limited to "Play views only" will be restricted to a guided mode. This means they cannot see a list of tickets in a view but instead will be directed to work on tickets one at a time, as designated by the system or administrators.
This mode helps maintain focus and ensures a methodical approach to ticket resolution, especially beneficial in managing workloads and prioritizing tasks based on predetermined workflows.
Show user profile pic in views
This allows for the display of user profile pictures alongside their names in the views within Lovely Views. When this option is enabled, wherever applicable, agents and administrators will see a small image next to a user's name, providing a quick visual reference.
This feature helps users quickly identify ticket requesters or assignees at a glance, adding a personal touch to the ticket list and potentially making the interface more user-friendly and engaging.
Always return to Lovely Views when all ticket tabs are closed
This ensures that the Lovely Views interface remains the default view each time an agent finishes their work on ticket tabs. When the last ticket tab is closed, Lovely Views will automatically reappear, regardless of where the agent was previously working within Zendesk. This feature is designed to streamline workflow by directing agents back to the Lovely Views main page, keeping them within the customized viewing environment and ready for the next task.
Return to Lovely Views workaround
This addresses a known issue where newer versions of Zendesk may not correctly return users to the Lovely Views interface after closing the last ticket tab. By toggling this setting on, Lovely Views will add a delay before redirecting back to ensure that users are brought back to the Lovely Views layout rather than the standard Zendesk views. This setting should only be enabled if users are experiencing problems with being redirected back to Lovely Views after closing ticket tabs. It's a practical solution for maintaining workflow consistency and ensuring that the Lovely Views enhanced interface remains the primary workspace for users.
Disable enhanced sorting (experimental)
Enhanced sorting within Lovely Views is an experimental feature designed to refine how tickets are sorted within your views. This advanced sorting method preloads 200 tickets per page, enhancing the accuracy of the sort results, especially when using multiple sorting parameters.
By default, Zendesk’s sorting is based on the first parameter, which may not always yield the correct order when multiple criteria are involved. Enhanced sorting addresses this by fetching a larger batch of tickets to ensure a more accurate multi-sort process.
However, if you find the default Zendesk sorting mechanism aligns better with your team’s needs, or you wish to assess the performance without the influence of this advanced sorting, you can opt to disable it. When turned off, Lovely Views will revert to the standard sorting approach, foregoing the benefits of the enhanced sorting feature.
It’s important to note that the enhanced sorting feature is designed with performance in mind. It limits the preloading to the first two pages (up to 400 tickets), balancing the improved sort accuracy with the need for timely ticket list rendering. This ensures that your ticket views remain efficient and responsive, without excessive delays.
Choose to disable enhanced sorting if you prefer the stability of traditional sorting methods, or keep it enabled to benefit from the most accurate ticket ordering, especially when applying secondary sort criteria.
Disable keyboard shortcuts
This option gives you the ability to turn off the keyboard shortcuts feature. When this setting is toggled on, the standard keyboard shortcuts that are typically available for quick actions within Lovely Views will be deactivated. This can help to prevent accidental actions if you find that you're frequently triggering shortcuts unintentionally, or if you prefer to use your keyboard for other shortcuts outside of Lovely Views. This setting allows for a more tailored use of the interface based on personal preference or specific workflow requirements.
Display description
This is a customizable feature that allows you to determine how descriptions attached to views are displayed within the Lovely Views interface.
You can choose to:
Show - This will display the description directly under the view's name, granting immediate visibility to any explanatory text for the view.
Hide - Selecting this option will not show any descriptions under the view's names, making for a cleaner look if descriptions are unnecessary or preferred to be hidden.
Show in tooltip - With this option, a small information icon will appear at the end of the view's name. Hovering over the name or icon will reveal the description in a tooltip, providing additional context on demand while keeping the interface uncluttered.
Auto-refresh rate
Adjust the auto-refresh rate to suit your needs, with options ranging from 1 to 5 minutes. This setting allows you to balance the need for up-to-date information with the performance of your system. Read more about this in the Refresh a view section.
Display auto-refresh control
Show the auto-refresh option in the view controls, allowing agents to toggle the auto-refresh feature on or off as needed, offering flexibility in how they receive ticket updates. Read more about this in the Refresh a view section.
Highlight unread tickets
This setting, when activated, makes it easier to identify which tickets have not been read by highlighting them in the ticket list. For this feature to function correctly, a specific field—Lovely Views unread tickets data—needs to be installed and active in your system. This hidden field is used to store and track the unread status of tickets for each user, ensuring that you can quickly notice new or unattended tickets at a glance.
Unread mode setting
This allows users to configure when a ticket should be marked as unread.
There are two options available:
Comment only - A ticket will only be marked as unread when a new comment is added. This setting is useful for users who want to track active conversations and respond to new messages from customers or team members promptly.
Any change - A ticket will be marked as unread if there are any updates, including new comments. This broader setting helps users who need to be notified about all types of updates to a ticket, ensuring that nothing is missed, and all changes are accounted for.
This setting can be customized to fit the workflow of the team and ensure that agents are alerted to the most relevant updates for their role and responsibilities.
Show day of the week in dates
This setting enables you to display the day of the week alongside the date for any ticket-related timestamps within the current year. With this option turned on, you’ll see the day (e.g., Monday, Tuesday) at the beginning of the date, providing a clearer context for when events occurred. When disabled, dates will display without the day of the week, except for dates within the current week, which will continue to show this detail for immediate reference.
Use Zendesk tag sorting method
When enabled, this applies Zendesk's default algorithm for ordering tags. This affects how tickets are grouped and sorted within dropdown fields throughout the interface. By leveraging Zendesk’s inherent sorting logic, users can expect a consistent organization of tags that aligns with the native behavior of the Zendesk platform.
Allow agents to close tickets
This setting allows selected agents to set tickets to a Closed status directly from the preview panel or in bulk edit mode. This feature can help streamline workflows for agents who frequently need to close multiple tickets efficiently.
Configuration options are:
- Role(s): Specify the roles that should have access to this feature. Agents with any of the selected roles (e.g., Administrator, Contributor, Team lead) will be able to close tickets.
- Group(s): Assign this permission to agents in specific groups (e.g., Billing team). Only agents within the selected groups will have the ability to close tickets.
Enable subject link
This setting makes ticket subjects clickable, enabling additional right-click actions such as 'Copy link address.' When enabled, agents can interact with ticket subjects as links for faster navigation and context sharing.
- Enabled: Ticket subjects appear as clickable links. Agents can right-click to perform actions like copying the URL or opening the ticket in a new tab.
- Disabled: Ticket subjects are displayed as plain text, preventing any clickable actions.
This feature is especially useful for teams who frequently share ticket links or need quick access to ticket URLs.
Option to disable “Return to Lovely Views”
This setting exposes Return to Lovely Views as a personal menu option for agents.
When enabled, agents can choose whether they want Lovely Views to automatically return after ticket tabs are closed, without requiring an admin to change global settings.
This is useful for teams where some agents prefer to stay in ticket tabs, while others want to return to Lovely Views between tickets.
Note: This setting only makes the option available. It does not force the return behavior on or off by itself.
Disable “Return to Lovely Views” on Play
This setting only appears when Option to disable “Return to Lovely Views” is enabled.
When turned on, Lovely Views will automatically disable Return to Lovely Views as soon as an agent enters Play mode. This prevents agents from being redirected back to a view while working through tickets one by one in Play.
Once Play mode is exited, the agent’s original Return to Lovely Views preference is respected again.
This setting helps ensure a smoother, uninterrupted workflow when using Play.
Preferences - Views list
This section allows you to manage how different ticket views are displayed and organized within your workspace. This feature enhances navigation and prioritization of tickets by providing options to hide certain views, customize the 'Misc' folder, and even export your views list to a CSV file for further analysis. By enabling or disabling these settings, you can tailor the interface to suit the needs of your team, making sure that everyone can focus on the tickets that matter most.
Hide 'Suspended' tickets view
This setting enables administrators to control the visibility of the Suspended tickets view within Lovely Views. When this option is turned on, non-admin agents will not see the Suspended tickets view as part of their default ticket view list, helping to streamline their workflow and focus on active tickets. However, agents with the permission to view all tickets, as dictated by their role settings, will still have access to the Suspended tickets through standard views, maintaining oversight while keeping less relevant tickets out of the immediate workflow.
Hide 'Deleted' tickets view
This option allows administrators to manage the visibility of the Deleted tickets view for non-admin agents within Lovely Views. When enabled, this setting prevents non-admin agents from viewing the Deleted tickets view, thereby simplifying their interface and ensuring they focus on current, actionable tickets. However, should an agent's role settings permit them to view all tickets, they will still have the capability to access and view Deleted tickets through the standard views, ensuring comprehensive access where necessary while keeping the workspace uncluttered.
Disable the 'Misc' folder
This setting allows users to manage the grouping of their ticket views within the Lovely Views app. By default, any views that are not part of a specific group are automatically placed into a miscellaneous or 'Misc' folder for organization. Toggling this setting off will disable the automatic grouping into the 'Misc' folder, allowing for a different method of organization as per user preference or workflow requirements.
Rename the 'Misc' folder
This setting offers users the ability to personalize the name of the default 'Misc' folder. The Miscellaneous folder is typically used to automatically group views that have not been categorized into other specific folders. By providing a text field, users can input a new name, changing it from "Misc" to a label of their choosing to better reflect the types of views it contains or to align with their organizational nomenclature.
Display the 'Misc' folder / root level views at bottom
This setting allows users to control the placement of the 'Misc' folder or any root level views within their ticket view hierarchy. When this feature is enabled, the designated 'Misc' folder or any views not assigned to a specific folder will be displayed at the bottom of the view list. This can help keep the view list organized by ensuring that all categorized folders appear first, followed by miscellaneous or uncategorized items. The default setting for this option is off, which means the 'Misc' folder or root level views will be positioned according to the default arrangement set by the system.
Subfolder order
This setting allows you to choose the position of subfolders in relation to the ticket views within a parent folder.
This organizational feature offers three options:
Subfolders mixed in with the views - This option integrates subfolders alphabetically with the views within the parent folder for a unified list.
Subfolders all at the top - Selecting this will place all subfolders above the individual views in the parent folder, prioritizing groupings over single views.
Subfolders all at the bottom - With this, subfolders are listed after all the individual views, keeping the focus on specific views before grouped categories.
This customizable setting helps in maintaining a structured and intuitive navigation through various ticket views, enhancing agents' efficiency in managing their workflow.
Disable the 'Personal' folder
This setting allows users to manage the organization of their personal views within the views list. If this setting is enabled, personal views will not be separated into their own 'Personal' folder but will be mixed with other views. This can help streamline the views list by eliminating one layer of categorization, potentially making it quicker for agents to navigate to their personal views. When this setting is turned off, personal views remain grouped under a distinct 'Personal' folder, which may help users who prefer a more structured organization of views.
Rename the 'Personal' folder
Here, you can provide a customized name for the folder that contains your personal views in Lovely Views. You can set it to any name that suits your organizational preferences or aligns best with your company's terminology. This can help keep your views organized and easily recognizable based on your personal workflow or team's structure.
Place 'Personal' folder at bottom
This allows you to choose the position of the Personal folder within the views list. When enabled, your Personal folder, which contains your individual ticket views, will be placed at the bottom of the list, below all other shared views. If this setting is disabled, the Personal folder will be positioned above the list of shared views, making it more immediately accessible.
Disable the 'My user profile' folder
This allows users to manage the visibility of the 'My user profile' folder within their ticketing interface. When this feature is turned on, the 'My user profile' folder, which typically contains four profile views — Requested, Assigned, CC'd, and Followed — will be hidden from the view list.
Rename the 'My user profile' folder
Here, you can provide a customized name for the folder that contains your user-specific views in Lovely Views. You can rename it to anything that aligns with your workflow or organizational terminology, making it easier to identify and organize your views.
Place 'My user profile' folder at bottom
This setting allows you to adjust the position of the 'My User Profile' folder in your views list. When enabled, the folder will appear at the bottom of the list, below shared views. When disabled, it will remain at the top, above shared views. This option helps you arrange your views list in a way that best suits your workflow.
Enable bookmarks view
This is a feature that, when activated, allows the bookmarks view to appear in the view list. Bookmarks are a convenient way to quickly access tickets that an agent may need to return to or keep an eye on. Enabling this setting makes it easier for agents to manage and access their bookmarked tickets directly from the main ticket view list, enhancing efficiency and workflow.
More information can be found in the Bookmarks section.
Enable 'My ticket tabs' view
This option is a feature that, when switched on, provides agents with a view that displays all the tickets they are currently working on in their open tabs. This view ensures that agents have quick access to their active ticket workload, making it more manageable to track and switch between multiple tickets that require attention. This can greatly improve multitasking efficiency and help keep the agent's workflow organized.
Show 'Download view list CSV' feature
This option allows you to enable the functionality to download a CSV file containing a list of all visible views along with their ticket counts. This feature can be made available to all admins and agents or restricted to admin users only, depending on the selection made in the dropdown menu. The ability to download view data can be a useful tool for reporting and analysis, giving a snapshot of ticket distribution across various views within the help desk system.
Enable 'Show only my views' toggle
This provides non-admin agents the ability to filter and display only the ticket views that they have access to. For administrators, this feature is always active to streamline their workflow. The toggle can be found when you click Menu (three dots) in the views list controls, granting quick access for agents to simplify their view and focus on their specific tasks.
Furthermore, administrators have the option to apply restrictions to this setting, which allows for the customization of its availability based on specific roles or groups within the organization. This customization ensures that agents see only the most relevant views, thereby increasing efficiency and reducing the clutter of unnecessary information.\
Enable favorites
This setting allows agents to mark certain views or searches as favorites for quicker access. This can streamline workflow by providing a way to quickly navigate to the most frequently used or important ticket views without searching through the entire list each time. When the feature is turned on, agents can curate their list of favorite views or searches to their preference, improving efficiency and personalizing their ticket management experience.
Preferences - Selected tickets
Here, admins can control ticket management with options like disabling bulk edits, enforcing consistent requestors for merges, and choosing custom merge methods. Additional controls include temporary tags during merges, setting agent comments to internal, and enabling bulk closing or selection of all tickets. There's also an option to change ticket requesters for adaptability.
Disable bulk edit
This allows administrators to control whether agents have the ability to edit multiple tickets at once. When this option is activated, by toggling on, it prevents the bulk edit functionality from being available to users. This can be particularly useful in situations where bulk changes could lead to mistakes or inconsistencies in ticket handling, or when there is a need to ensure that each ticket receives individual attention. It's a way to maintain a higher level of control over the ticketing process and ensure that changes are made deliberately and individually.
'Don't change group' default setting
This allows you to control the default behavior of the Assignee field within the bulk edit function. When set to "Unchecked", it implies that by default, the group assignment of tickets will not be preserved when performing bulk edits unless specifically chosen otherwise. This setting is useful for administrators or agents who frequently reassign groups of tickets to different groups and prefer the system not to retain the previous group assignment by default.
Requester must be the same when merging tickets
This setting ensures that only tickets with the same requester can be merged together. This is a safeguard to prevent merging tickets from different requesters, which could lead to confusion or a mix-up of information. When this option is turned on, it adds a constraint to the ticket merging process to maintain requester consistency.
Custom merge method
This lets you select the method for merging ticket data when combining tickets.
The options available are:
Latest - The most recently updated ticket's data will be used for the merged ticket. This is the default setting.
Rolling - Data from the least recently updated ticket is updated with information from more recently updated tickets as they are merged.
None - No ticket data from the merged tickets is copied to the new ticket.
This setting gives you control over how information is consolidated during the merge process to best fit your workflow and data retention preferences.
Force custom merge method onto agent
When enabled, this setting would force a specific merge method to be used by agents when combining tickets. If left disabled, agents have the freedom to choose their preferred method for merging tickets.
Add temporary tag while merging
When this setting is activated, it automatically adds a temporary tag, joined_comments, to a ticket at the beginning of a custom merge operation. This tag remains on the ticket throughout the merging process and is then removed once the merge is complete. The purpose of this temporary tag is to assist with the management of trigger conditions within the ticketing system, such as preventing redundant notifications during the merge process.
Agent comments are internal by default
This dictates the visibility status of agent comments in the bulk edit dialog. When this feature is enabled, any comments made by agents during bulk edits will automatically be set as internal notes. This means that these comments will not be visible to end-users and are meant for internal use within the team or organization. Conversely, if the option is disabled, the default comment visibility adheres to the public visibility settings established in the Zendesk ticket settings, meaning that comments could be seen by customers or end-users unless manually set to internal.
Allow bulk close tickets
This provides administrators with the ability to mark multiple tickets as "Closed" simultaneously through the bulk edit feature. This can significantly streamline workflows by allowing the closure of numerous tickets at once without the need to individually update the status of each ticket, thereby saving time and effort for administrative tasks within the ticketing system.
Enable 'Select all pages' feature
This allows the ability to select all tickets in a view with one action. This setting can be configured to be available for all admins and agents, just admins, or completely disabled.
Allow to change requesters
This provides the ability for agents to change the requester of a ticket directly from the ticket sidebar. When this feature is enabled, a dropdown or search field will be available to select a different requester for the ticket. This can be particularly useful in scenarios where tickets are created on behalf of users by other parties, and later need to be reassigned to the correct requester. If the feature is disabled, agents will not be able to modify the requester from the ticket sidebar, thus maintaining the originally assigned requester throughout the lifecycle of the ticket. This setting can be configured to be available for all admins and agents, just admins, or completely disabled.
Preferences - Agent collision
Here, you'll find an option designed to help prevent multiple agents from working on the same ticket simultaneously, which can cause conflicts and duplicate work.
Enable agent collision indicators
Enable this to show an open eye icon next to any ticket that other agents are actively viewing, and a closed eye icon when another agent has the ticket open but is not currently viewing it. This feature helps prevent overlapping work and enhances coordination among team members.
Admins (and other roles or groups, if set) also have access to a "Current ticket activity" view, providing an overview of all ticket activity in real time.
When another agent is actively viewing the ticket, the view shows an open eye icon next to the ticket. The ticket preview also shows the agent's avatar in full opacity under "On this ticket."
When another agent has the ticket open but is not currently viewing it, the view shows a closed eye icon next to the ticket. The ticket preview also shows the agent's avatar in lower opacity under "On this ticket."
Agent collision refresh rate
If your agents encounter a Rate limit reached warning in Zendesk, increase this value to slow the refresh rate. This reduces the number of agent collision-related API calls on your Zendesk instance. Aim to set this value as low as possible while still preventing rate limit warnings. The minimum allowable setting is 5 seconds.
Traffic monitor
The traffic monitor chart displays the number of API calls per minute in real-time. This visualization helps you understand the frequency of API calls related to agent collisions and is essential for managing system performance.
API calls (pink line): Displays the total number of API calls made by your system at specific times, highlighting the frequency of interactions with the Zendesk API.
API calls per minute (purple area): Indicates the rate of API calls made per minute, helping you monitor and adjust the intensity of API usage to avoid rate limits and ensure smooth operation.
Online users (blue line): Shows the number of active users at any given moment, allowing you to correlate spikes in user activity with increases in API calls.
Below the chart, the user activity table provides a detailed breakdown of sessions and API calls by individual agents.
Name: Displays the agent's name.
Sessions: Number of active sessions the agent has.
Recent API calls: API calls made by the agent in the selected timeframe.
Total API calls:
Cumulative count of API calls made by the agent.
This monitoring tool is instrumental in adjusting the refresh rate settings for agent collision indicators. By observing the frequency of API calls, admins can effectively manage their Zendesk API usage limits, ensuring that the agent collision indicators are efficient without frequently hitting the rate limits. Adjusting the refresh rate can be crucial in maintaining optimal system performance and avoiding disruptions in the agent's workflow.
Enable 'Current ticket activity' view
The "Current ticket activity" view allows admins and other designated users to monitor real-time activity on tickets. This feature provides an overview of which agents are viewing or working on tickets, helping to prevent agent collision and improve coordination within the support team.
- Role(s): You can specify roles that should have access to this view. If roles are selected, only agents with those roles will be able to see the "Current ticket activity" view.
- Group(s): You can also assign access based on specific groups. If groups are selected, only agents within those groups will have access.
This view is particularly useful for tracking ongoing ticket activity, managing team resources, and ensuring tickets are handled efficiently without overlap.
Preferences - Ticket sidebar
Here, admins can customize the ticket navigation experience within the ticket sidebar. These settings offer various options to enhance the user interface according to individual or organizational needs. Users can choose to display a Bookmark button for easy access to frequently used tickets, ensure consistent visibility of ticket navigation controls, and enable quick navigation through tickets with First, Previous, Next, and Last buttons. These tools are designed to streamline ticket handling by providing quick links and simplifying the process of moving between tickets in the sidebar.
Show Bookmark button in ticket sidebar
When enabled, this adds a Bookmark button to the ticket sidebar within your ticketing interface. This button allows users to quickly bookmark or unbookmark the ticket they are currently viewing for easy reference later on.
Always show ticket nav in ticket sidebar
This setting allows for constant visibility of ticket navigation controls on the sidebar, regardless of how the ticket was opened. When this setting is active, navigation controls including the "First," "Previous," "Next," and "Last" buttons are always displayed, offering quick navigation between tickets within the sidebar. If this setting is disabled, the navigation controls only appear if the ticket is opened via the "First" button. This functionality is designed to enhance user experience by providing consistent and convenient ticket navigation directly from the sidebar.
Enable First button
When activated, this allows users to quickly navigate to the first ticket in the current view. This button can enhance efficiency by providing a shortcut to the start of a ticket list, saving time that would be otherwise spent manually scrolling or paging through multiple tickets. It's a useful feature for those who need to access the beginning of a list frequently.
Enable Previous button
When turned on, this allows users to navigate to the previous ticket in the queue directly from the ticket sidebar. This provides a quick and convenient way to review tickets sequentially without having to return to the main list. It enhances the user's workflow by allowing for easy back-and-forth navigation through tickets.
Enable Next button
When activated, this provides users with a button to quickly navigate to the next ticket in the queue from the ticket sidebar. This feature streamlines the ticket handling process, making it more efficient by allowing users to move forward through the tickets without having to go back to the main list or dashboard.
Enable Last button
This lets users navigate directly to the last ticket in the current view. This feature is especially helpful in managing long lists of tickets, providing quick access to the end of the list. When the Last button is enabled, it appears alongside other navigation controls, offering an efficient way to jump to the final ticket without having to page through each one individually. This can save time for agents who need to reference the most recent or last ticket in a series for updates or follow-up actions.
Preferences - Top toolbar
Here, admins have configuration options for the top navigation bar of the ticketing interface. Here, users can customize what folders are displayed for ease of access. Options include showing a dedicated folder for bookmarks, a folder for tickets currently being viewed by the agent, and a folder for current ticket activity. There is also the option to display a favorites folder, making it simple for users to access frequently used views. These settings ensure that the top toolbar is tailored to the user's preferences, enabling them to navigate through the ticketing system efficiently.
Show Bookmarks folder
This allows users to display a dedicated view for bookmarks via the top toolbar. When set to "Same as Views list setting (Show)," it mirrors the bookmarks visibility settings of the Views list. Other options include "Show," which would keep the bookmarks folder always visible, or "Hide," which would remove it from the the top toolbar views list. This feature helps users quickly access their marked or frequently used views or tickets, enhancing navigation efficiency.
Enable 'My ticket tabs' folder
This setting allows for a dedicated folder to be displayed within the top toolbar views list. This folder aggregates all the tickets that an agent is currently working on, indicated by the 'My ticket tabs' label. This can help agents quickly navigate between tickets they are actively handling. The setting can be configured to mimic the visibility settings of the Views list, which means if the 'My ticket tabs' folder is set to show in the Views list, the 'My ticket tabs' folder will also be shown in the top toolbar; otherwise, it can be individually set to show or hide based on administrative preferences.
Enable 'Current ticket activity' folder
When the feature is enabled, it provides a dedicated folder via the top toolbar list viewable only by administrators (and set roles and groups) which displays all current user activity on tickets. This allows for real-time tracking of ticket handling, giving oversight of ticket progress and the ability to quickly spot any concurrent actions on the same ticket. The dropdown options allow to either show or hide this folder. This feature is integrated with the agent collision settings to provide a comprehensive overview of ticket activity within the support team.
Show favorites folder
This setting allows you to control the visibility of the Favorites folder on the top toolbar. The dropdown options allow for mirroring the Views list setting for the Favorites folder, or show or hide the Favorites folder. By selecting one of these options, you can customize your workspace according to your needs and preferences for accessing favorited views or searches quickly.
Preferences - Backup & Restore
Here, admins are provided a safeguard for Lovely Views settings. The backup function allows you to save your current configuration as a JSON file, which can be a lifesaver in case your settings are lost or corrupted. With the restore option, you can swiftly reinstate your settings from the saved JSON. This ensures that you can quickly return to a known good configuration without manually redoing each setting, providing peace of mind and efficient management of the Lovely Views environment.
Backup
Create a secure copy of your current configuration by exporting all settings as a JSON file. This simple process involves highlighting and copying the entire block of JSON code, which encapsulates your Lovely Views configuration, then pasting the copied JSON data into a code editor or JSON viewer. This step is crucial for maintaining the integrity of the data, as these tools are designed to handle JSON formatting and will prevent the introduction of unwanted characters or symbols.
Restore
In the event that you need to revert to a previously saved configuration, or if there has been a corruption in the current settings, the Restore function is your go-to solution. In the provided text field, paste the JSON configuration that you have backed up using a code editor or JSON viewer, then click Restore to overwrite the current settings with the ones from your backup. This reinstates your Lovely Views environment to the exact state captured in the backup, allowing for a seamless recovery process.
Overriding tickets per page settings
Lovely Views provides flexible options for customizing the number of tickets displayed per page. This feature can be adjusted globally, for specific views, or according to individual user preferences. Here’s how to understand and manage these settings:
Global setting
Purpose: Set a default number of tickets per page across all views.
Usage: As an admin, navigate to General settings in Lovely Views and set the Tickets per page value. This global setting will apply to all views unless overridden by more specific settings.
More information can be found in Tickets per page.
Specific view setting (Global individual view setting)
Purpose: Customize the number of tickets per page for a particular view.
Usage:
- If you are an admin, and the view is not a personal view, setting this will override the global setting for everyone accessing that specific view.
- Navigate to Extra view settings for the desired view and set the Tickets per page value.
More information can be found in Extra view settings.
Personal preference for a specific view
Purpose: Override both global and specific view settings with your personal preference.
Usage:
- As an individual user, you can set your preferred number of tickets per page for any view you access.
- This personal setting will take precedence over both the global and the specific view settings.
More information can be found in Pagination for navigation.
Here's a summary of the three settings:
- Global setting: Applies universally unless overridden.
- Specific view setting: Admins can set this to override the global setting for all users on a particular view.
- Personal preference: Individual users can override both the global and specific view settings for their personal experience.
Here's an example:
-
Global setting: An admin updates the setting to 200 tickets per page.
-
Specific view setting: For "General questions" view, set to 180 tickets per page by an admin.
-
Personal preference: A user sets their personal preference to 100 tickets per page for "General questions" view.
In this example, when the user accesses the "General questions" view, they will see 100 tickets per page, respecting their personal preference over the global and specific view settings.
Frequently asked questions (FAQs)
Whether you're just getting started or seeking to refine your ticket management skills, these FAQs are designed to provide quick, clear guidance. From installation to customization, and navigation to backup, we've compiled the most essential information to help you leverage Lovely Views to its fullest potential. If your question isn't answered here, don't hesitate to reach out to our support team for further assistance.
1. What is Lovely Views?
Lovely Views is an advanced tool for Zendesk that enhances ticket management through expanded features for organization, navigation, and customization.
2. How do I install Lovely Views?
Install Lovely Views from the Zendesk Marketplace and find it in the Zendesk navigation bar upon launching Zendesk.
3. Can I customize the ticket views in Lovely Views?
Yes, you can organize ticket views into folders, use bulk actions, set personal preferences, and adjust auto-refresh rates, among other customization options.
4. Are ticket previews available in Lovely Views?
Yes, Lovely Views offers detailed ticket previews that can be toggled between regular and enhanced.
5. How can I ensure that Lovely Views is the default view when I start Zendesk?
In the General section of Preferences, adjust the 'Auto-open on startup' setting.
6. Can I change the number of tickets displayed per page in Lovely Views?
Yes, you can set the desired number of tickets per page under the General section of Preferences. You can also override this global setting.
7. Is there a Dark Mode available in Lovely Views?
Yes, Lovely Views supports a Dark Mode that can be enabled for both the main app and the sidebar.
8. How do I prevent agents from making bulk changes to tickets?
You can disable bulk edit functionalities in the Selected Tickets section of Preferences.
9. What is the 'Agent Collision' feature in Lovely Views?
Agent Collision indicators help prevent multiple agents from working on the same ticket simultaneously, visible through an eye icon.
10. How can I back up my Lovely Views configuration?
Use the Backup & Restore section of Preferences to copy and save your JSON configuration for future restoration.
11. Can I export a list of my views?
Yes, Lovely Views provides an option to download your views list as a CSV file.
12. What does 'Requester must be the same when merging tickets' mean?
It's a setting that requires the same requester on all tickets being merged to maintain consistency.
13. How can I manage views effectively in Lovely Views?
Utilize folders and sub-folders for organization, and rename, add, or delete views as necessary.
14. What are the benefits of good ticket management with Lovely Views?
Benefits include increased efficiency, enhanced customer satisfaction, streamlined processes, and better prioritization.
15. How can I access updates and news about Lovely Views?
In the About / News section, you can stay informed about the latest features, announcements, and updates.
16. Can I restore Lovely Views settings to a previous configuration?
Yes, use the Restore function in the Backup & Restore section to revert to a backed-up configuration.
17. Is there a way to prevent other agents from seeing certain views?
Admins can hide views like Suspended or Deleted tickets from non-admin agents in the Views list section of Preferences.
18. How do I manage ticket previews and bulk actions?
Control these settings in the General and Selected tickets sections of Preferences, customizing them to your team's workflow.
19. Can I personalize the navigation experience in Lovely Views?
Yes, with settings like showing bookmarks, enabling ticket tab views, and managing top toolbar visibility, personalization is possible.
20. Is there support available for Lovely Views?
For any assistance, you can reach out to the support team at support@lovestockleaf.com.
Conclusion
Thank you for exploring the features and functionalities of Lovely Views. This guide, complete with cross-references, is crafted to enhance your understanding and navigation, especially for features influenced by administrative settings. These links facilitate easy access to related sections, ensuring a comprehensive grasp of how settings impact your Lovely Views experience.
With its advanced customization options, robust management settings, and enhanced navigation tools, Lovely Views is designed to adapt to your unique workflow, aiming to streamline your ticketing process and elevate customer satisfaction.
As you delve deeper into utilizing Lovely Views, remember that we are continually committed to refining your ticket management experience. Your feedback is crucial to the evolution of Lovely Views, helping us to innovate and tailor future updates and features. Should you have any further questions or need support, our dedicated team at support@lovestockleaf.com is always ready to assist.
Comments